How to Maintain Your Homes Siding and Keep It Looking New
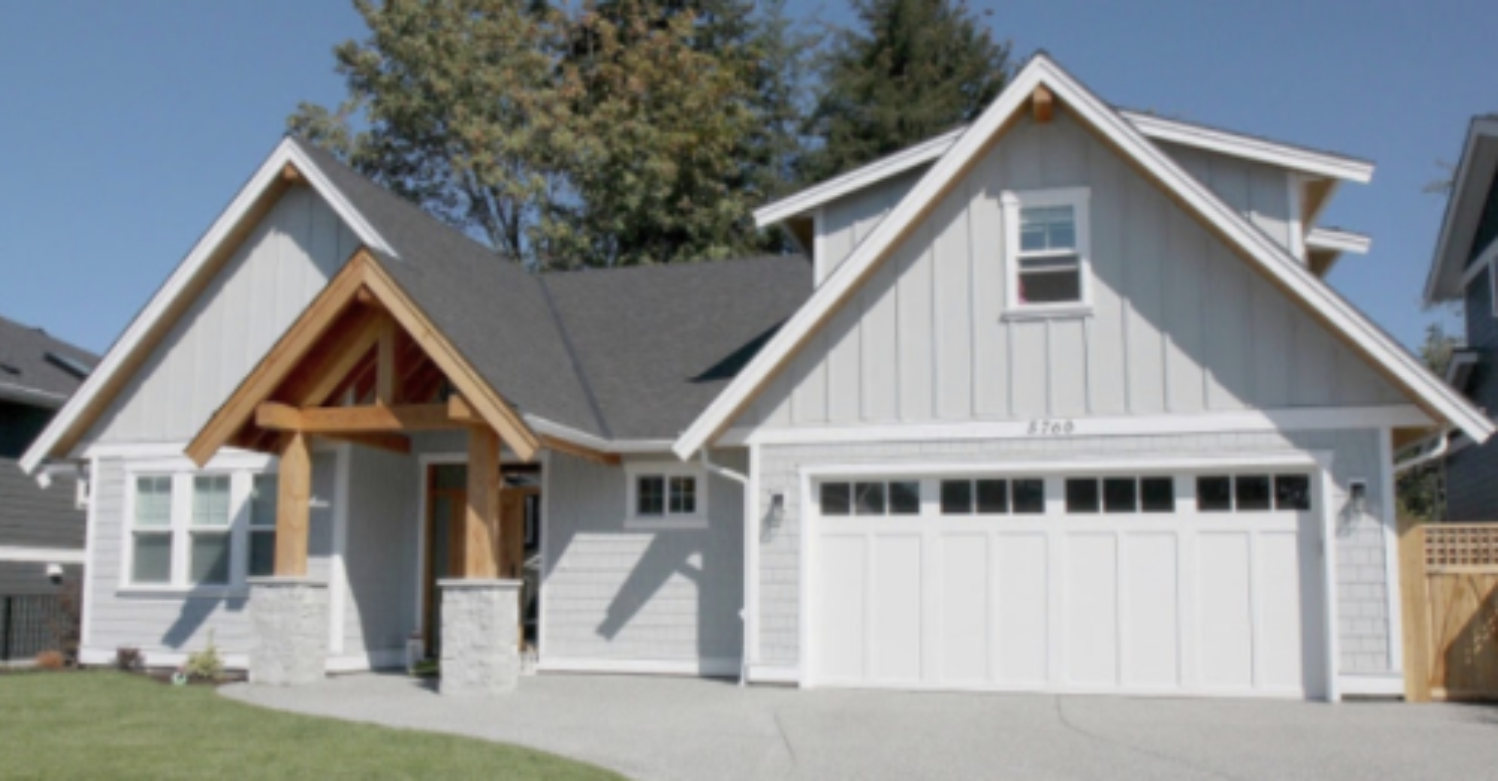
How to Maintain Your Home’s Siding and Keep It Looking New is more than just a matter of aesthetics; it’s a crucial aspect of homeownership that safeguards your investment and enhances curb appeal. This guide delves into the essential steps for preserving your siding’s beauty and functionality, regardless of its material. We’ll explore various siding types, their unique maintenance needs, and practical solutions for common problems, empowering you to keep your home looking its best for years to come.
From regular cleaning and inspection to addressing minor repairs and preventing water damage, we’ll cover a comprehensive range of topics. Learn how to identify and address issues such as mold, mildew, and sun damage, and discover strategies for protecting your siding from harsh weather conditions. We’ll even guide you through the process of painting or staining your siding, and when it’s best to call in a professional for assistance. By following these simple yet effective techniques, you can significantly extend the lifespan of your siding and maintain the value of your home.
Understanding Your Siding Material
Maintaining your home’s siding effectively begins with understanding the material it’s made from. Different siding types have varying lifespans, maintenance needs, and susceptibility to damage. Choosing the right siding for your climate and budget is crucial for long-term home value and curb appeal. This section will outline the characteristics of common siding materials to help you understand your home’s specific needs.
Siding Material Types and Their Maintenance
Several materials are commonly used for home siding, each with its own set of advantages and disadvantages. Vinyl siding is popular for its affordability and low maintenance, while wood offers a classic, natural look but requires more upkeep. Fiber cement combines the durability of cement with the aesthetic appeal of wood, though it demands more careful handling during installation and maintenance. Other options include aluminum, steel, and engineered wood.
Siding Material Comparison
The following table compares the lifespan, cost, and maintenance requirements of various siding materials. It’s important to note that these figures are estimates and can vary based on factors such as climate, installation quality, and the specific product used.
| Material | Lifespan (Years) | Cost (per sq ft, approximate) | Maintenance Requirements |
|---|---|---|---|
| Vinyl | 20-40 | $3-$8 | Periodic cleaning, occasional repair of minor damage. |
| Wood | 20-50+ (depending on wood type and maintenance) | $8-$20+ | Regular painting or staining, cleaning, caulking, repair of rot or insect damage. |
| Fiber Cement | 30-50+ | $8-$15 | Periodic cleaning, occasional painting, repair of cracks or chips. |
| Aluminum | 30-50+ | $6-$12 | Cleaning, occasional repainting (if desired), repair of dents or scratches. |
| Steel | 40-60+ | $8-$15 | Cleaning, occasional repainting (if desired), repair of dents or scratches. Prone to rust if damaged. |
| Engineered Wood | 25-40 | $5-$12 | Regular cleaning, occasional repainting or staining, repair of damage. Susceptible to moisture damage if not properly sealed. |
Common Siding Problems
Understanding the common problems associated with each siding type allows for proactive maintenance and prevents costly repairs.
Vinyl Siding Problems
Common issues with vinyl siding include cracking, warping, fading, and damage from impact. Cracking can be caused by expansion and contraction due to temperature changes, while warping may result from improper installation or exposure to excessive heat. Fading is a natural process, but it can be accelerated by prolonged sun exposure. Impact damage, such as dents or holes, can be repaired with patching kits. Regular cleaning helps prevent dirt buildup that can accelerate fading.
Wood Siding Problems
Wood siding is susceptible to rot, insect infestation, and damage from moisture. Regular painting or staining helps protect the wood from the elements and prevents rot. Inspecting for insect damage and addressing it promptly is crucial. Caulking gaps and cracks helps prevent moisture penetration. Proper ventilation behind the siding is essential to prevent moisture buildup.
Fiber Cement Siding Problems
Fiber cement siding is durable but can be prone to cracking or chipping, especially during installation. It can also be susceptible to moisture damage if not properly sealed. Regular cleaning helps prevent staining and maintains its appearance. Cracks or chips should be repaired promptly to prevent further damage. Painting protects against moisture and enhances its aesthetic appeal.
Regular Cleaning and Inspection
Maintaining your home’s siding involves more than just admiring its aesthetic appeal; it’s about proactive care that protects your investment and extends its lifespan. Regular cleaning and thorough inspections are crucial steps in this process, preventing minor issues from escalating into costly repairs. By implementing a consistent maintenance schedule, you can keep your siding looking its best for years to come.
Cleaning Different Siding Materials
The best cleaning method depends heavily on your siding material. Using the wrong cleaning solution or technique can damage your siding, leading to premature wear and tear. For example, abrasive cleaners can scratch vinyl siding, while pressure washing can damage delicate wood siding. Always test any cleaning solution on an inconspicuous area first to ensure it doesn’t cause discoloration or damage.
- Vinyl Siding: A simple solution of mild dish soap and water, applied with a soft-bristled brush, is usually sufficient. Rinse thoroughly with a garden hose. Avoid high-pressure washing, as this can damage the siding’s surface.
- Wood Siding: Wood siding requires more careful cleaning. A solution of oxygen bleach and water can effectively remove mildew and dirt. Always follow the manufacturer’s instructions for the oxygen bleach. A soft-bristled brush or a pressure washer with a low-pressure nozzle can be used, but exercise caution to avoid damaging the wood.
- Fiber Cement Siding: Fiber cement siding is durable and relatively low-maintenance. It can typically be cleaned with a solution of mild detergent and water, using a soft-bristled brush or a low-pressure washer. Avoid abrasive cleaners.
- Aluminum Siding: Aluminum siding is easy to clean. A simple solution of soap and water, applied with a soft brush or sponge, is generally sufficient. A garden hose can be used for rinsing.
Inspecting Your Siding for Damage
A thorough visual inspection of your siding should be performed at least twice a year, ideally in spring and fall. This inspection helps identify potential problems early, preventing them from worsening and becoming more expensive to repair. Look for signs of damage such as cracks, holes, loose panels, discoloration, or signs of insect infestation.
- Begin at the ground level and systematically work your way up, carefully examining each panel.
- Check for any cracks or holes in the siding. These can be caused by impact damage or age.
- Look for loose or damaged panels. Loose panels can be caused by wind damage or improper installation.
- Inspect for signs of moisture damage, such as discoloration or warping.
- Check for any signs of insect infestation, such as holes or insect droppings.
- Examine caulking around windows and doors for cracks or gaps. These gaps can allow water to penetrate the siding.
Yearly Siding Inspection Checklist
A checklist can ensure you don’t miss any critical areas during your inspection. This systematic approach aids in early problem detection and preventative maintenance.
| Item | Check |
|---|---|
| All siding panels for cracks, holes, or damage | ✔ |
| Caulking around windows and doors | ✔ |
| Flashing around chimneys and vents | ✔ |
| Soffits and fascia for damage or rot | ✔ |
| Gutters and downspouts for clogs or damage | ✔ |
| Foundation for signs of water damage | ✔ |
| Overall appearance for discoloration or mildew | ✔ |
Repairing Minor Damage
Maintaining your home’s siding involves addressing minor damage promptly to prevent larger, more costly repairs down the line. Small cracks, holes, and loose panels can compromise your home’s weather resistance and aesthetic appeal. Knowing how to handle these issues effectively will extend the life of your siding and maintain your home’s curb appeal.
Repairing Cracks and Holes in Vinyl Siding
Small cracks in vinyl siding can often be repaired with a vinyl siding repair patch kit. These kits typically include a flexible patching material designed to match the color of your siding, and adhesive. Clean the area thoroughly, apply the adhesive according to the manufacturer’s instructions, and press the patch firmly into place. For larger holes, you may need to cut a section of the damaged panel and replace it with a new piece, ensuring a tight seal to prevent water infiltration. Always choose a patch or replacement panel that closely matches the color and texture of your existing siding.
Repairing Cracks and Holes in Wood Siding
Wood siding requires a slightly different approach to repair. Small cracks can be filled with wood filler, ensuring it’s compatible with exterior conditions and properly sealed to prevent moisture absorption. Larger holes may require more extensive repairs, potentially involving replacing damaged sections of wood. This may necessitate using wood putty, followed by sanding and repainting to match the existing finish. Remember to apply a high-quality exterior-grade wood sealant to protect the repaired area from the elements. For significant damage, it’s best to consult a professional.
Repairing Cracks and Holes in Fiber Cement Siding
Fiber cement siding is durable but can still sustain damage. Minor cracks can often be repaired with a high-quality exterior-grade patching compound specifically designed for fiber cement. The process typically involves cleaning the area, applying the compound, allowing it to dry, and then sanding smooth. For larger holes or significant damage, replacing the damaged section may be necessary. This often requires carefully cutting out the damaged area and installing a new piece of fiber cement siding, ensuring a secure and weathertight fit. Professional assistance may be recommended for larger repairs.
Replacing Damaged Siding Panels
Replacing damaged siding panels requires careful planning and execution. First, identify the damaged panel and determine its size and type. Then, carefully remove the damaged panel, taking care not to damage surrounding panels. This often involves using a utility knife or pry bar, working gently to avoid cracking adjacent panels. Next, measure the replacement panel to ensure a proper fit. Finally, install the new panel, securing it according to the manufacturer’s instructions. Using appropriate fasteners and ensuring a watertight seal is crucial for preventing future damage.
Caulking Around Windows and Doors
Caulking is a vital step in preventing water damage. Old or cracked caulk around windows and doors should be removed completely before applying new caulk. Use a quality exterior-grade caulk that is paintable and flexible. Apply the caulk in a smooth, continuous bead, ensuring complete coverage of the gap between the siding and the window or door frame. Smooth the caulk with a wet finger or caulking tool for a neat, professional finish. Regular inspection and recaulking, as needed, will help maintain a waterproof seal and protect your home from water damage.
Preventing Water Damage
Protecting your home’s siding from water damage is crucial for maintaining its longevity and aesthetic appeal. Water intrusion can lead to rot, mold growth, and costly repairs. By proactively addressing potential water sources and implementing preventative measures, you can significantly extend the life of your siding and preserve your home’s value. This section will outline key strategies for preventing water damage to your siding.
Proper Gutter and Downspout Maintenance Protects Siding
Regular maintenance of gutters and downspouts is paramount in preventing water damage to your siding. Clogged gutters and downspouts cannot effectively channel rainwater away from your home’s foundation. This leads to water overflowing and running down the siding, causing staining, damage, and potential structural issues. Clean gutters and downspouts at least twice a year, in spring and fall, removing leaves, debris, and any accumulated sediment. Ensure downspouts are securely attached and extend far enough away from the foundation to direct water away from the house. Consider installing gutter guards to minimize the frequency of cleaning. Regular inspection for leaks or damage is also vital; repair or replace damaged sections promptly to prevent water accumulation.
Preventing Water Accumulation Around the Foundation
Water accumulating around your home’s foundation is a major contributor to siding damage. This pooling water can seep into the foundation, leading to moisture penetration and subsequent damage to the siding. Proper grading of the soil around your foundation is crucial. The ground should slope away from the house at a gradient of at least 6 inches per 10 feet to facilitate proper drainage. Regularly inspect the soil around your foundation for any signs of settling or erosion that might disrupt the grading. Consider installing a French drain or other drainage system if necessary to further improve drainage. Maintaining landscaping and keeping vegetation trimmed away from the foundation also prevents water from accumulating against the walls. Regularly check for and repair any cracks or gaps in the foundation to prevent water infiltration.
Redirecting Water Away from the House
A well-designed water diversion plan is crucial for minimizing the exposure of your siding to moisture. This plan should include proper grading, as previously discussed, but also consider additional elements. Extend downspouts at least 4 to 6 feet away from the foundation, ideally into a dry well or a drainage system. Consider installing splash blocks at the base of downspouts to further direct water away from the foundation. For areas with particularly heavy rainfall, the installation of a swale or a French drain might be necessary to manage larger volumes of water. These systems collect and redirect water away from the house, reducing the risk of water damage to the siding. Regularly inspect and maintain these systems to ensure their effectiveness.
Dealing with Mold and Mildew
Mold and mildew growth on your home’s siding is not only unsightly but can also compromise the structural integrity of your home if left untreated. Understanding the causes and effective removal methods is crucial for maintaining your siding’s appearance and protecting your investment. This section will outline common causes, removal techniques, and preventative measures.
Causes of Mold and Mildew Growth on Siding
Mold and mildew thrive in damp, shaded environments. Several factors contribute to their growth on siding. These include excessive moisture from rain, leaks, poor drainage, insufficient ventilation, and shaded areas where moisture lingers. The presence of organic matter, such as leaves or decaying wood, can also provide a food source for mold and mildew, accelerating their growth. Additionally, high humidity levels in the air create ideal conditions for spore germination and proliferation. Regular cleaning and proper maintenance can significantly reduce the likelihood of these problems.
Removing Mold and Mildew from Different Siding Materials
The method for removing mold and mildew varies depending on the siding material. Aggressive scrubbing can damage delicate materials, while insufficient cleaning may leave behind spores, leading to recurrence.
Mold and Mildew Removal on Vinyl Siding
For vinyl siding, a solution of one part bleach to three parts water is generally effective. Apply this solution using a soft-bristled brush or a garden sprayer, ensuring even coverage. Allow the solution to sit for approximately 10-15 minutes before rinsing thoroughly with clean water. Always test a small, inconspicuous area first to ensure the solution doesn’t damage the siding. For stubborn stains, a mild detergent can be added to the solution. Avoid using abrasive cleaners or high-pressure washers, as these can scratch the vinyl surface.
Mold and Mildew Removal on Wood Siding
Wood siding requires a more gentle approach. A solution of trisodium phosphate (TSP) can be used, but always follow the manufacturer’s instructions carefully. After applying the TSP solution and allowing it to dwell, scrub gently with a soft-bristled brush. Thoroughly rinse the area with clean water. For heavily stained areas, a pressure washer set to a low pressure may be necessary, but exercise caution to avoid damaging the wood. After cleaning, consider applying a wood preservative to help prevent future mold and mildew growth.
Mold and Mildew Removal on Fiber Cement Siding
Fiber cement siding is generally resistant to mold and mildew, but occasional cleaning is still recommended. A solution of water and a mild detergent is usually sufficient. Scrub gently with a soft-bristled brush and rinse thoroughly with clean water. Avoid using abrasive cleaners or harsh chemicals that could damage the surface.
Preventing Future Mold and Mildew Growth
Preventing mold and mildew is far easier than removing it. Regular cleaning is paramount. At least twice a year, inspect your siding for signs of mold and mildew. Clean gutters and downspouts regularly to ensure proper water drainage away from the house. Trim back overhanging branches and shrubs to allow for adequate sunlight and airflow, reducing moisture accumulation. Ensure proper ventilation in attics and crawl spaces to prevent moisture buildup. Consider using a mildewcide or fungicide as a preventative measure, particularly in areas prone to high humidity or shade. Following these steps will help maintain your siding’s appearance and protect your home’s structure.
Protecting Siding from the Elements
Your home’s siding endures constant exposure to the elements, and understanding how these forces impact its longevity is crucial for proper maintenance. Sun exposure, temperature fluctuations, and harsh weather events all contribute to wear and tear, potentially shortening the lifespan of your siding and diminishing its aesthetic appeal. Proactive measures to protect your siding are essential for preserving its beauty and structural integrity.
Protecting your siding from the elements requires a multi-faceted approach. Understanding the specific challenges posed by sun, extreme temperatures, and severe weather allows for targeted preventative strategies.
Sun Exposure and its Effects on Siding
Prolonged exposure to ultraviolet (UV) radiation from the sun can degrade many siding materials. UV rays can cause fading, cracking, and weakening of the siding’s surface, making it more susceptible to damage from other environmental factors. Darker colored sidings tend to absorb more heat and are therefore more vulnerable to sun damage than lighter colors. For example, vinyl siding, while generally durable, can become brittle and chalky under intense sun exposure.
Mitigating Sun Damage
Several strategies can effectively minimize sun damage to your siding. The application of a high-quality protective coating specifically designed for your siding material is a highly recommended approach. These coatings create a barrier against UV rays, preventing them from penetrating the siding and causing degradation. Regular cleaning of the siding also helps to remove dirt and grime that can trap heat and accelerate the fading process. Consider planting trees or shrubs to provide shade, particularly on the south-facing sides of your home. This natural shading can significantly reduce the amount of direct sunlight your siding receives. For homes with significant sun exposure, awnings or retractable shades can offer additional protection.
Extreme Temperatures and Their Impact
Extreme temperatures, both hot and cold, can stress siding materials, leading to expansion and contraction. This cyclical process can cause cracking, warping, and even separation of siding panels over time. Materials like wood are particularly susceptible to these effects, experiencing significant expansion in humid conditions and contraction in dry, cold weather.
Damage from Extreme Weather
Severe weather events, such as hailstorms and strong winds, pose significant threats to siding. Hail can cause dents, cracks, and even holes in siding, while high winds can dislodge panels or cause damage through debris impact. Coastal areas face additional challenges from salt spray, which can corrode metal siding and accelerate the degradation of other materials.
Mitigating Damage from Extreme Weather
Preparing for and mitigating damage from extreme weather involves several key steps. Regular inspections after storms are essential to identify any damage promptly. For homes in hail-prone areas, consider installing impact-resistant siding. Properly secured and well-maintained flashing around windows and doors is critical to preventing water intrusion during storms. The use of strong fasteners during siding installation is crucial for ensuring panels remain secure during high winds. Regular trimming of overhanging trees and shrubs can minimize the risk of damage from falling branches.
Painting or Restoring Siding
Refreshing your home’s siding with a new coat of paint or stain can significantly enhance its curb appeal and protect it from the elements. This process, however, requires careful consideration of your siding material and the proper techniques to ensure a long-lasting and attractive finish. Choosing the wrong paint or improper preparation can lead to premature peeling, cracking, and other issues, negating the benefits of the project.
Painting or staining siding extends its lifespan and improves its aesthetic value. The process involves selecting the appropriate paint or stain, preparing the surface adequately, and applying the coating correctly. Different siding materials require specific approaches to ensure optimal results.
Siding Material and Paint/Stain Selection
The type of siding you have directly influences the type of paint or stain you should use. For example, wood siding benefits from breathable stains that allow the wood to expand and contract without damaging the finish. Vinyl siding, on the other hand, requires a paint specifically formulated for this material to ensure proper adhesion and prevent cracking. Fiber cement siding often requires a primer before painting to ensure good paint adherence. Always check the manufacturer’s recommendations for your specific siding material. Using an inappropriate paint or stain can lead to early failure and require costly repairs. For instance, using oil-based paint on vinyl siding can lead to cracking and peeling.
Preparing the Siding Surface for Painting or Staining
Proper surface preparation is crucial for a successful paint or stain job. This multi-step process ensures the new coating adheres properly and lasts for years. Neglecting preparation often results in premature paint failure.
- Cleaning: Thoroughly clean the siding to remove dirt, grime, mildew, and loose paint. Pressure washing is often effective, but be cautious not to damage the siding with excessive pressure. A soft bristle brush and a cleaning solution may be necessary for stubborn stains. For mildew, a solution of bleach and water (always follow manufacturer’s instructions for dilution) can be effective, but proper safety precautions (gloves, eye protection) are essential.
- Repairing: Address any cracks, holes, or damaged areas before painting. Use appropriate patching materials and allow sufficient drying time before proceeding. For wood siding, this may involve filling gaps with wood filler. For vinyl, repairing may involve patching or replacement of damaged sections.
- Priming (if necessary): Some siding materials, particularly fiber cement, benefit from a primer coat before painting. This improves adhesion and provides a uniform base for the top coat. Choose a primer specifically designed for your siding material.
- Caulking: Seal any gaps or cracks around windows, doors, and other areas where the siding meets other building components. This prevents water intrusion and helps maintain the integrity of the siding.
Applying the Paint or Stain
Once the surface is prepared, apply the paint or stain according to the manufacturer’s instructions. Use high-quality brushes, rollers, or sprayers to achieve an even coat. Multiple thin coats are generally better than one thick coat, allowing for better penetration and preventing runs or drips. Allow sufficient drying time between coats. Always work in a well-ventilated area and wear appropriate personal protective equipment (PPE). For example, using a sprayer can provide a more even finish but requires more careful preparation to avoid overspray.
Winterizing Your Siding
Preparing your home’s siding for winter is crucial for preventing damage and maintaining its appearance. Winter weather, with its fluctuating temperatures, ice, and snow, can put significant stress on your siding, leading to cracks, warping, and even water damage. Taking proactive steps to winterize your siding will help protect your investment and ensure your home remains comfortable and well-protected throughout the colder months.
Protecting Siding from Ice and Snow Buildup
Ice dams, formed when melting snow refreezes at the edge of your roof, can cause significant damage to siding. The weight of the ice and the water that seeps behind the siding can lead to cracking, buckling, and rotting. Regularly clearing snow from your roof, particularly around the edges and gutters, helps prevent ice dam formation. Proper attic insulation is also essential, as it reduces the temperature differential between the warm attic air and the cold exterior, minimizing snow melt and subsequent refreezing. Consider installing ice and water shields under your roofing shingles as a further preventative measure. These membranes are designed to prevent water penetration, even if ice dams form.
Addressing Potential Water Damage
Water intrusion is a major concern during winter. Melting snow and ice can find their way behind siding through cracks, gaps, or damaged caulking. Regular inspection for these vulnerabilities is vital. Caulking around windows, doors, and other areas where siding meets other building components should be checked and reapplied as needed. Any visible cracks or gaps in the siding itself should be repaired promptly using appropriate materials for your siding type. Proper drainage around the foundation is also crucial to divert water away from the siding and prevent water accumulation against the house.
Winter Siding Maintenance Checklist
Before the first snowfall, it is beneficial to create a checklist to ensure all preventative measures have been taken. This proactive approach minimizes the risks of damage and keeps your home protected.
- Inspect all siding for cracks, gaps, or damage. Repair or replace any damaged sections.
- Check and reapply caulking around windows, doors, and other penetrations.
- Clean gutters and downspouts to ensure proper drainage.
- Inspect and clear any snow or ice buildup on the roof, paying particular attention to the edges and gutters.
- Ensure proper attic insulation to minimize ice dam formation.
- Consider installing ice and water shields under your roofing shingles for added protection.
- Inspect the foundation for proper grading and drainage to divert water away from the house.
Hiring a Professional
Maintaining your home’s siding can be a rewarding DIY project, but some situations demand the expertise of a professional siding contractor. Knowing when to call in a professional ensures the longevity and aesthetic appeal of your home’s exterior. This section will outline scenarios where professional help is beneficial and compare the costs and benefits of DIY versus professional services.
Professional siding contractors possess specialized skills, tools, and experience to handle complex repairs and installations efficiently and safely. They are also typically insured, providing liability protection in case of accidents or damage. This contrasts with DIY approaches, which may lack these crucial elements.
Situations Requiring Professional Assistance
Several situations necessitate the expertise of a professional siding contractor. These include extensive damage, complex repairs requiring specialized tools or techniques, and projects that involve working at heights. For instance, significant storm damage, such as broken or missing siding over large areas, is best left to professionals who can assess the structural integrity and ensure proper repairs. Similarly, replacing large sections of siding or installing new siding on a multi-story building requires specialized equipment and safety measures, best handled by experienced professionals. Furthermore, intricate repairs, like matching the existing siding profile or color, often require the skills of a seasoned professional to ensure a seamless and aesthetically pleasing finish.
Cost and Benefit Comparison: DIY vs. Professional
The decision between DIY siding maintenance and hiring a professional hinges on a careful cost-benefit analysis. DIY projects can save money upfront, particularly for minor repairs like cleaning or patching small holes. However, the cost of purchasing tools, materials, and potentially making costly mistakes can outweigh the savings. Conversely, while hiring a professional involves a higher initial investment, it offers several benefits including efficiency, expertise, warranty coverage on labor and materials, and the peace of mind of knowing the job is done correctly and safely. For instance, a DIY attempt at repairing extensive storm damage might result in further damage and increased repair costs down the line. A professional, on the other hand, will properly assess the situation, source appropriate materials, and perform the repair correctly the first time, preventing future issues.
Questions to Ask Potential Siding Contractors
Before hiring a siding contractor, it’s crucial to ask pertinent questions to ensure you choose a qualified and reputable professional. A thorough vetting process helps avoid potential issues and ensures a positive outcome. This includes verifying licensing, insurance, and experience, and obtaining detailed quotes outlining the scope of work and materials used.
- Are you licensed and insured to perform siding work?
- How many years of experience do you have in siding installation and repair?
- Can you provide references from previous clients?
- What type of warranty do you offer on your workmanship and materials?
- Can you provide a detailed written estimate outlining all costs, including labor, materials, and permits?
- What is your process for dealing with unexpected issues or changes during the project?
- What is your timeline for completing the project?
- What is your method for cleaning up after the completion of the project?
Epilogue
Maintaining your home’s siding is an ongoing process, but with a proactive approach and the knowledge provided in this guide, you can significantly extend its life and preserve its beauty. Remember that regular inspections, prompt repairs, and preventative measures are key to avoiding costly repairs down the line. By understanding your siding material and implementing the techniques outlined here, you can ensure your home remains a source of pride and enjoyment for years to come. Take the time to invest in your home’s exterior—it’s an investment that pays off handsomely.