The Ultimate Guide to Home Siding Installation Costs in 2024
The Ultimate Guide to Home Siding Installation Costs in 2024 unveils the complexities of upgrading your home’s exterior. From understanding the various siding materials available—vinyl, wood, fiber cement, and metal—to navigating the intricacies of labor costs and contractor selection, this guide provides a comprehensive overview. We’ll explore the factors influencing pricing, offer practical tips for saving money, and equip you with the knowledge to make informed decisions throughout your siding project.
This guide will walk you through each step, from initial planning and budgeting to the final installation and ongoing maintenance. Whether you’re a homeowner tackling a DIY project or hiring a professional contractor, this resource will be your trusted companion, ensuring a smooth and successful siding installation experience.
Introduction to Home Siding Installation
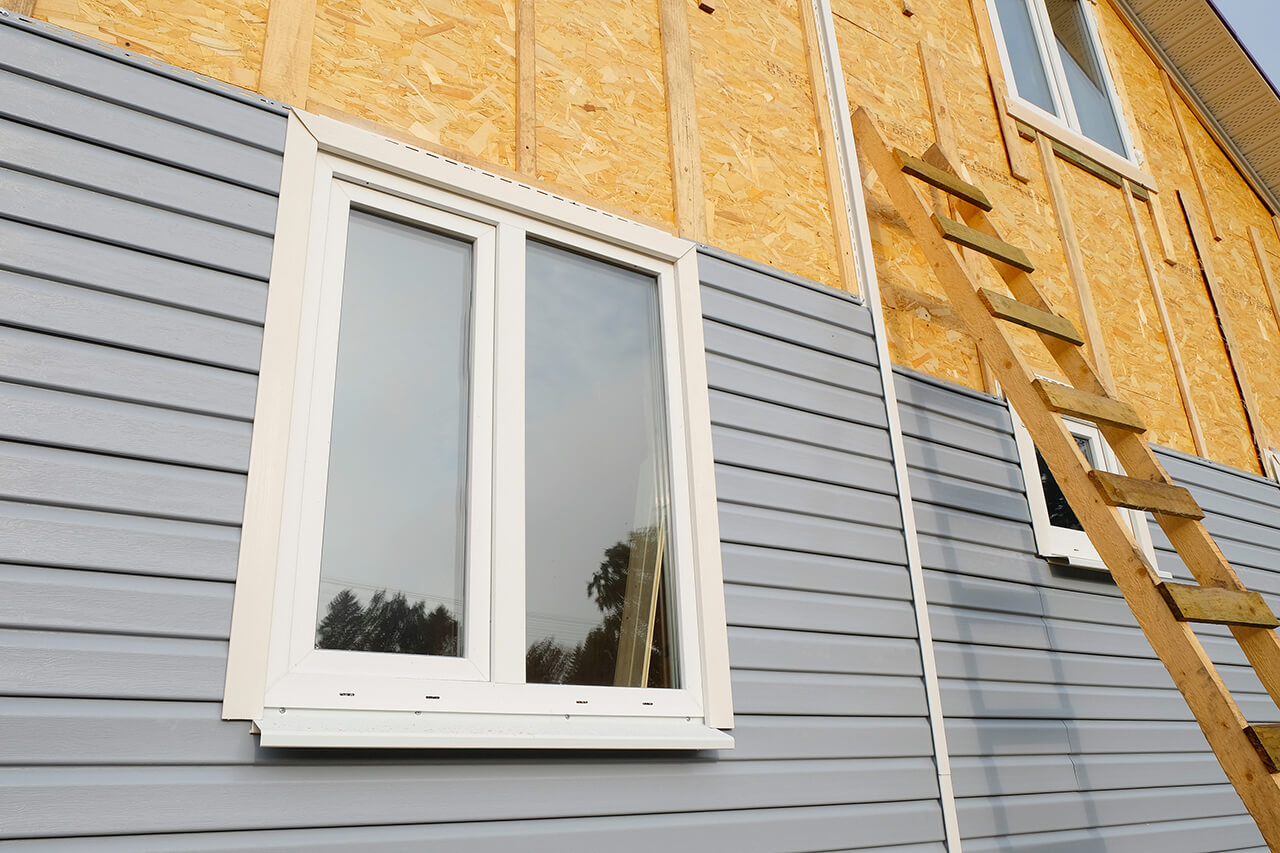
Home siding installation is a significant undertaking, impacting both the aesthetic appeal and the structural integrity of a house. The process involves carefully preparing the exterior walls, installing the chosen siding material, and ensuring proper sealing and finishing to protect the home from the elements. Understanding the various stages, material options, and associated costs is crucial for homeowners planning this project.
Home siding installation typically begins with a thorough inspection of the existing wall structure. Any necessary repairs, such as replacing damaged sheathing or addressing moisture issues, are addressed before the installation begins. Next, the chosen siding material is installed according to manufacturer specifications, often involving nailing or fastening the panels to the wall. Finally, trim pieces, flashing, and caulking are used to complete the installation, ensuring a watertight and visually appealing finish.
Types of Siding Materials
Various siding materials offer diverse aesthetic options and performance characteristics. The choice depends on factors like budget, climate, and personal preference. Each material has its own pros and cons regarding cost, durability, maintenance, and energy efficiency.
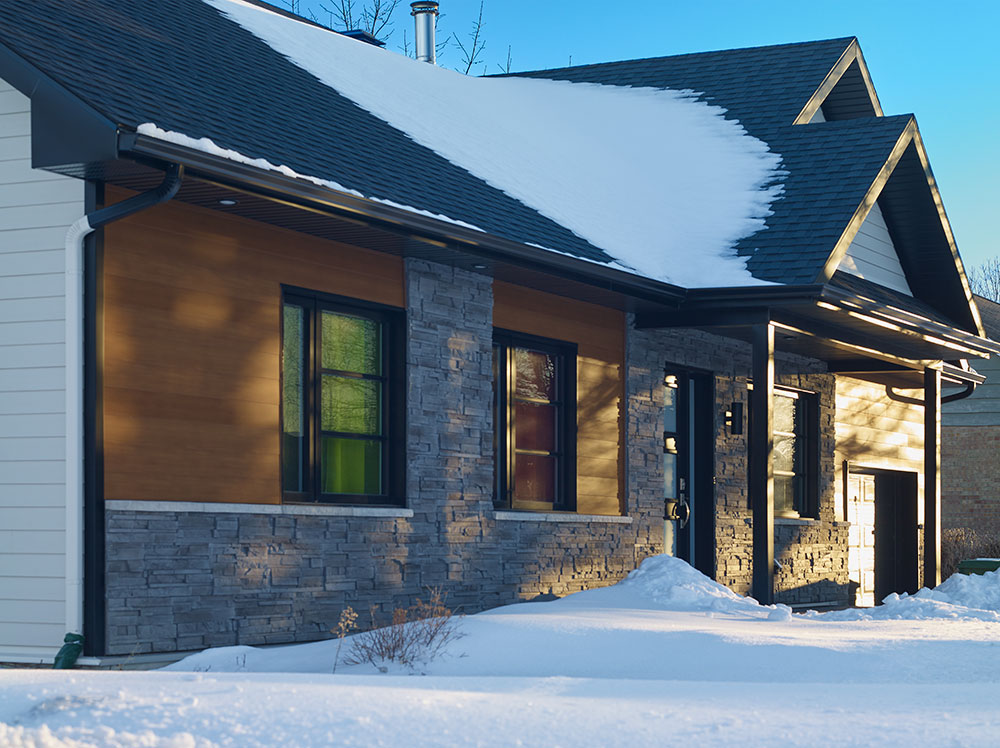
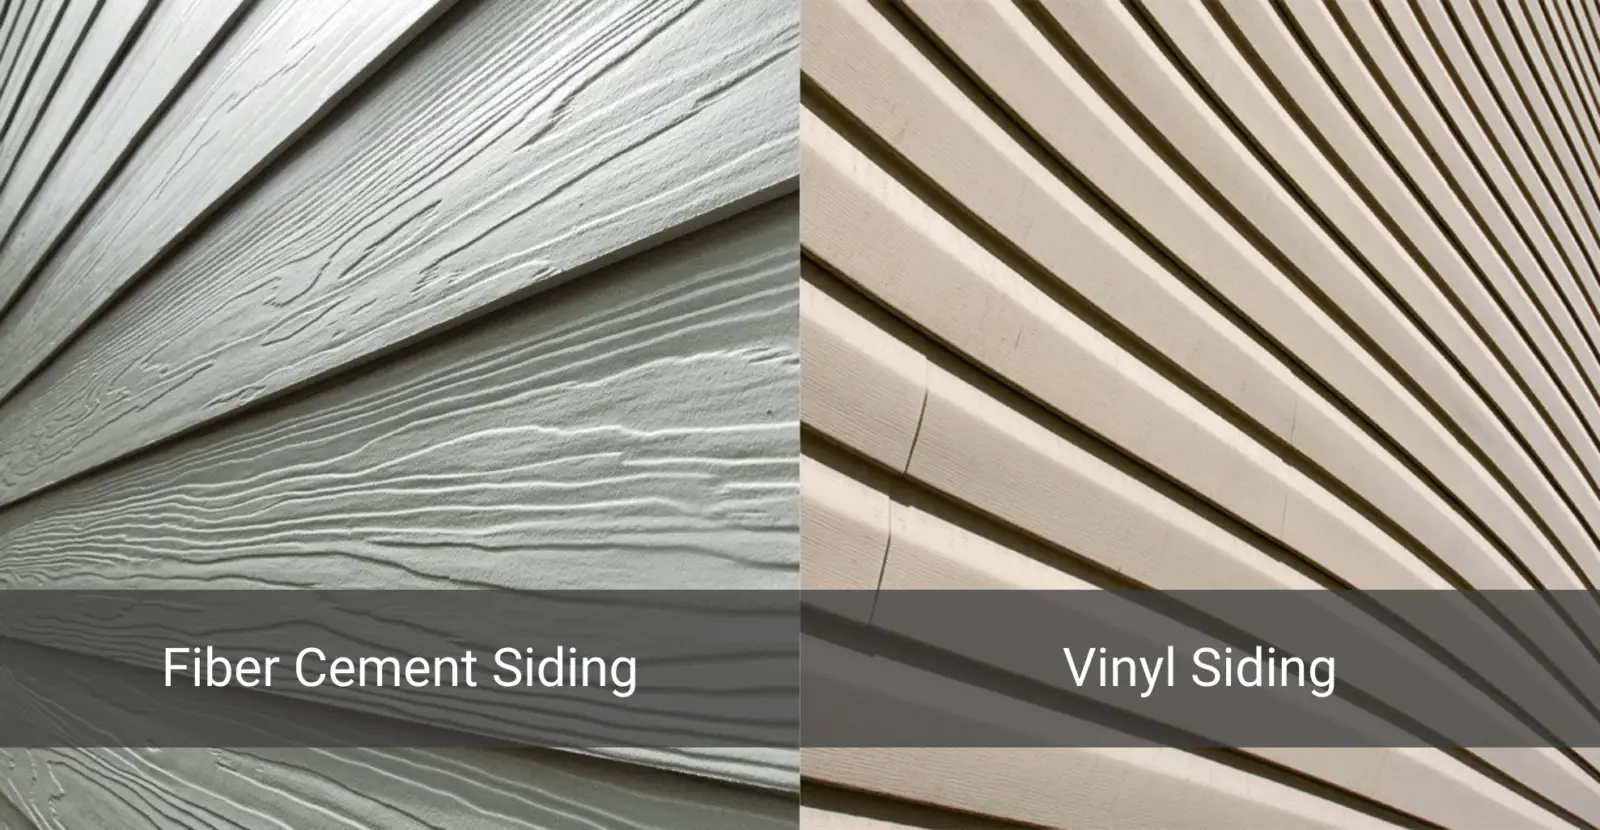
- Vinyl Siding: A popular choice due to its affordability, low maintenance, and wide range of colors and styles. Vinyl is relatively easy to install and requires minimal upkeep, making it a practical option for many homeowners. However, it can be susceptible to damage from extreme temperatures and may not be as durable as other options.
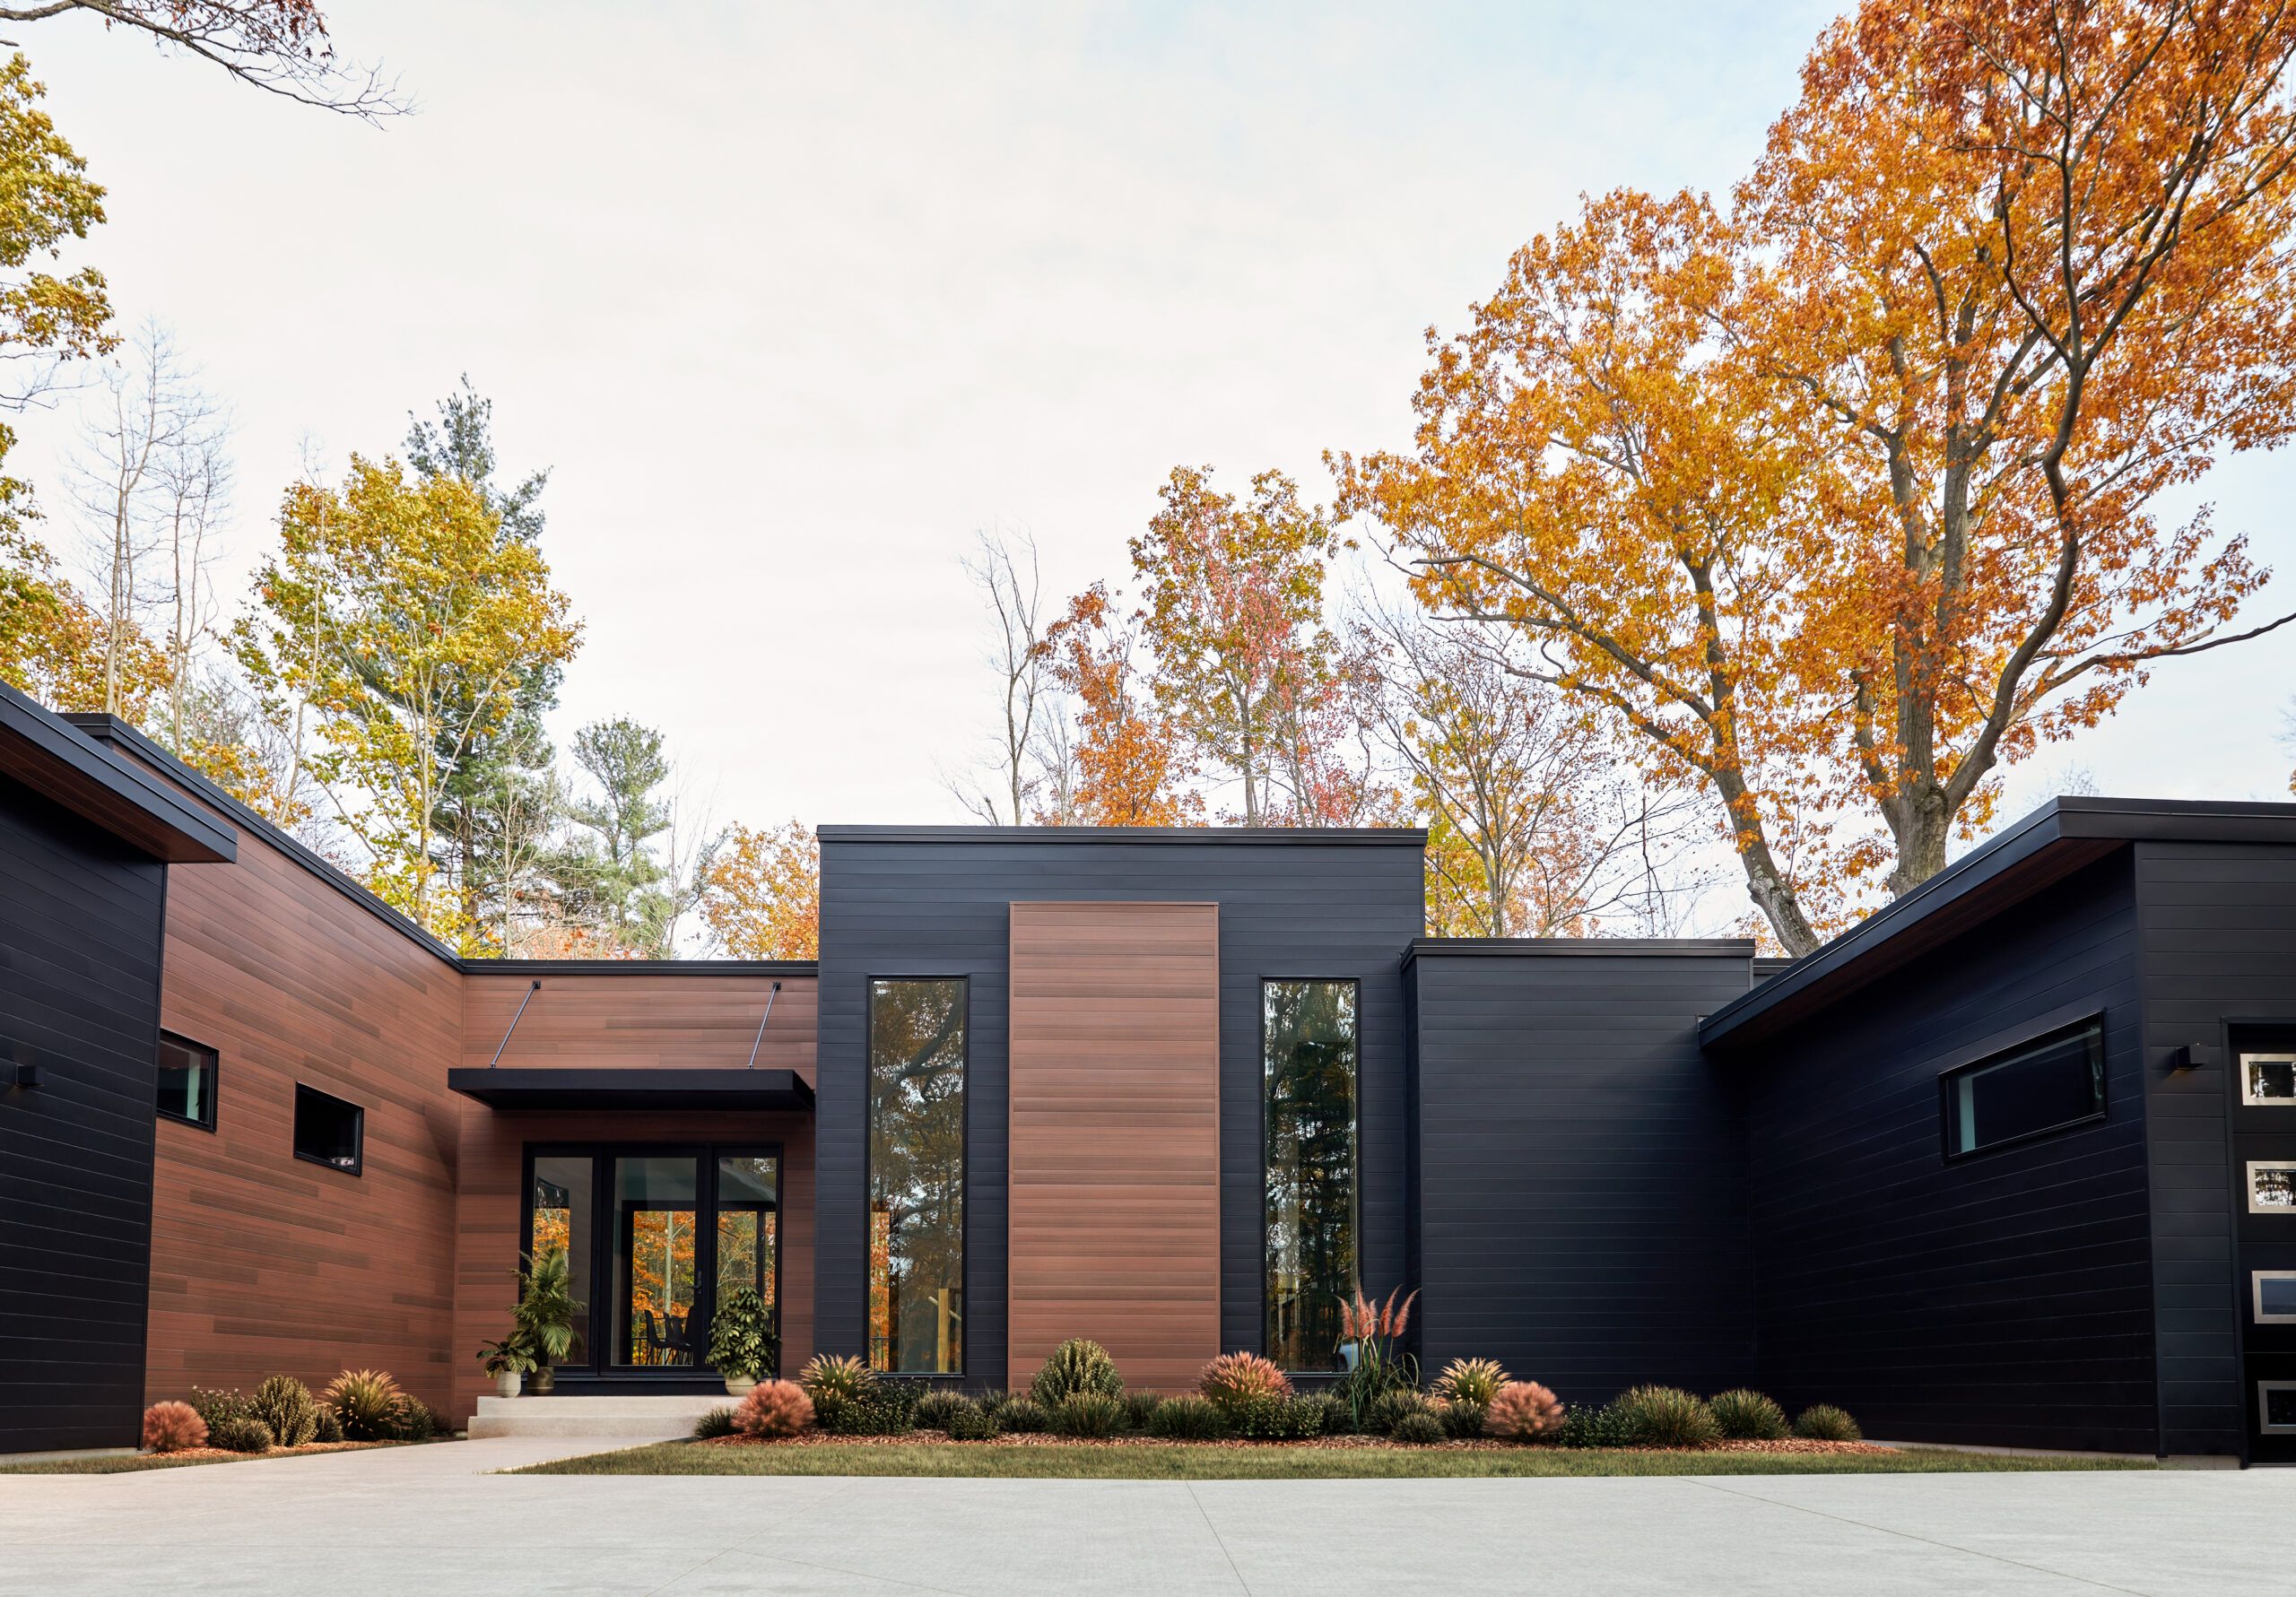
- Fiber Cement Siding: A more durable and fire-resistant alternative to vinyl, fiber cement siding mimics the look of wood but requires more professional installation and is generally more expensive. Its longevity and resistance to damage make it a worthwhile investment for many.
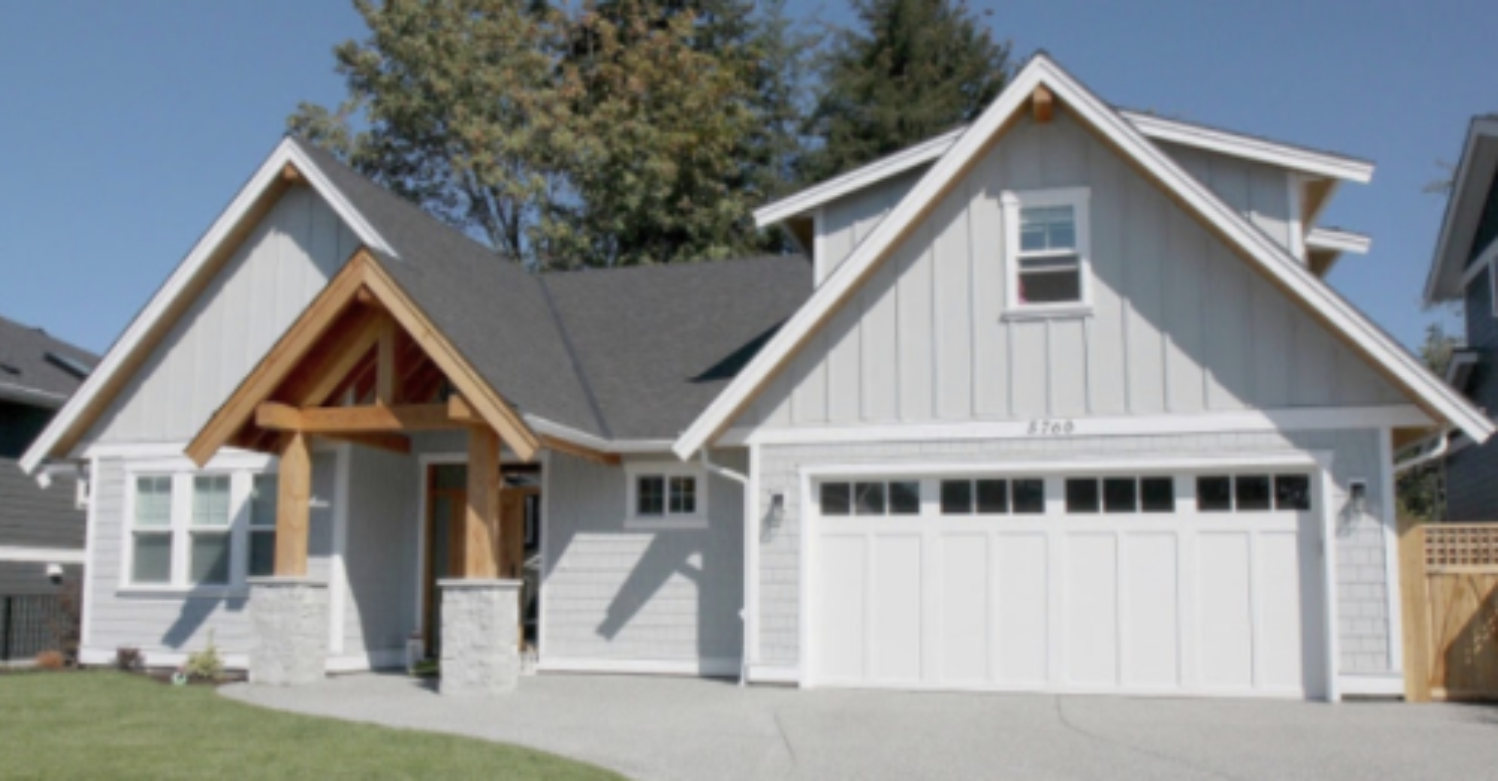
- Wood Siding: A classic choice that offers a natural and aesthetically pleasing look. Wood siding can be expensive and requires regular maintenance to prevent rot, insect damage, and weathering. Proper sealing and painting are essential for its longevity.
- Metal Siding: Highly durable and resistant to fire, insects, and rot, metal siding (often aluminum or steel) is a low-maintenance option. It’s generally more expensive than vinyl but offers exceptional longevity and protection.
- Brick Siding: While not technically “siding” in the traditional sense, brick veneer offers a durable and visually appealing exterior. It’s a significant investment, both in terms of material cost and installation labor.
A Brief History of Home Siding
Early forms of home siding focused primarily on protection from the elements. Early American homes often utilized readily available materials like wood clapboard, which provided basic weather protection. As technology advanced, new materials and manufacturing processes emerged, leading to the development of more durable and aesthetically diverse siding options. The 20th century saw the rise of mass-produced materials like vinyl and aluminum siding, making them more accessible and affordable to homeowners. More recently, advancements in materials science have led to the creation of high-performance siding options that offer enhanced energy efficiency and durability. The evolution of siding reflects changing needs and preferences, balancing cost, aesthetics, and performance.
Factors Affecting Siding Installation Costs in 2024
Several key factors contribute to the overall cost of home siding installation in 2024. These factors interact in complex ways, making accurate cost prediction challenging without a detailed assessment of the specific project. Understanding these variables allows homeowners to make informed decisions and budget effectively.
Material Choices and Pricing
The type of siding material significantly impacts the project’s cost. Vinyl siding, a popular choice due to its affordability and low maintenance, generally falls within a lower price range. Fiber cement siding offers superior durability and fire resistance but commands a higher price. Wood siding, while aesthetically pleasing, is more expensive and requires more maintenance. Metal siding, such as aluminum or steel, presents a durable and long-lasting option, but its cost can vary depending on the chosen material and finish. The cost per square foot varies considerably; for instance, vinyl might range from $3 to $12, while fiber cement could range from $8 to $20, and wood siding could easily exceed $20 per square foot, excluding labor. These prices are estimates and can fluctuate based on regional availability and market conditions.
Professional vs. DIY Installation
Choosing between professional and DIY installation significantly affects the final cost. While DIY installation can initially seem cheaper, it often involves unforeseen expenses and potential setbacks. Professionals possess the expertise, tools, and insurance to ensure a quality installation, minimizing risks of damage or future repairs. However, professional installation adds a considerable labor cost to the overall project. A professional installation typically includes costs for labor, permits, waste disposal, and potential cleanup. A DIY approach, while potentially saving on labor, may require purchasing specialized tools, potentially leading to higher upfront costs. Moreover, mistakes during DIY installation could lead to costly repairs down the line. Considering the potential risks and time investment, the long-term cost-effectiveness of professional installation is often superior.
Cost Breakdown for Different Siding Types
The table below provides a general cost breakdown for different siding types, including material and labor costs. Remember that these are estimates, and actual costs may vary based on location, project complexity, and contractor fees.
| Siding Type | Material Cost (per sq ft) | Labor Cost (per sq ft) | Total Estimated Cost (per sq ft) |
|---|---|---|---|
| Vinyl | $4 – $8 | $3 – $6 | $7 – $14 |
| Fiber Cement | $10 – $15 | $5 – $8 | $15 – $23 |
| Wood | $15 – $25 | $7 – $12 | $22 – $37 |
| Metal | $12 – $20 | $6 – $10 | $18 – $30 |
Labor Costs and Contractor Selection
Choosing the right contractor is crucial for a successful and cost-effective siding installation. Labor costs represent a significant portion of the overall project expense, and understanding regional variations and contractor pricing structures is essential for informed decision-making. This section will guide you through the process of finding a reputable and qualified contractor, ensuring you receive high-quality workmanship at a fair price.
Average Hourly Rates for Siding Installers
Hourly rates for siding installers vary significantly based on geographic location, experience level, and the type of siding being installed. Generally, more experienced installers command higher hourly rates, reflecting their expertise and efficiency. Urban areas tend to have higher labor costs compared to rural regions due to increased demand and higher overhead expenses for contractors. For example, in major metropolitan areas like New York City or Los Angeles, hourly rates could range from $50 to $80 or more per installer, while smaller towns or rural areas might see rates between $35 and $60. These are estimates, and obtaining multiple quotes from local contractors is always recommended to establish a more accurate range for your specific location. The complexity of the job, such as the presence of intricate architectural details or the need for significant repairs before installation, will also impact the overall labor costs.
Contractor Pricing Structures
Contractors typically employ various pricing structures. Some charge by the hour, others by the square foot of siding installed, and some offer fixed-price contracts for the entire project. Hourly rates offer transparency but can lead to unpredictable final costs if the project takes longer than anticipated. Pricing per square foot provides a more predictable estimate, but it may not accurately reflect the complexities of the job. Fixed-price contracts offer certainty in terms of the final cost, but they may require a more detailed upfront assessment of the project scope to avoid disputes later. Comparing quotes from contractors using different pricing structures requires careful consideration of the project’s specific needs and potential unforeseen complications. For instance, a complex project with numerous obstacles might be better suited for a fixed-price contract to avoid potential cost overruns associated with hourly rates.
Finding Reputable and Qualified Contractors
Identifying reliable and qualified contractors requires diligent research and verification. Start by seeking recommendations from friends, family, or neighbors who have recently had siding installed. Online resources such as review websites and contractor directories can provide additional leads. Check for licensing and insurance: ensure the contractor holds the necessary licenses and liability insurance to protect you from potential problems. Verify their experience and qualifications by reviewing their portfolio of past projects and requesting references from previous clients. Don’t hesitate to contact these references to inquire about their experiences with the contractor’s work quality, professionalism, and adherence to timelines. A thorough vetting process helps minimize risks and ensures a smoother installation process.
Contractor Evaluation Checklist
Before engaging a contractor, use the following checklist to evaluate their suitability:
- Licensing and Insurance: Verify current and valid licenses and liability insurance.
- Experience and References: Review their portfolio and contact references.
- Detailed Estimate: Obtain a comprehensive, itemized written estimate that includes all costs.
- Contract Terms: Carefully review the contract, paying attention to payment schedules, timelines, and warranty provisions.
- Communication: Assess their responsiveness and clarity in communication throughout the process.
- Professionalism: Observe their professionalism and attention to detail during initial consultations.
Material Costs Breakdown for Different Siding Types
Choosing the right siding material significantly impacts the overall cost of your home exterior renovation. This section details the price variations among common siding types, considering factors that influence their final cost. Understanding these differences will help you make informed decisions based on your budget and aesthetic preferences.
Vinyl Siding Material Costs
Vinyl siding is a popular choice due to its affordability and low maintenance. Prices typically range from $2 to $8 per square foot, depending on the style, thickness, and color. Higher-end options, featuring more intricate designs or enhanced durability, fall towards the higher end of this range. For instance, a basic white vinyl siding might cost around $2-$4 per square foot, while a premium textured vinyl siding with a wood-grain finish could cost $6-$8 per square foot. These prices typically exclude installation costs.
Wood Siding Material Costs
Wood siding offers a classic and aesthetically pleasing look, but it comes with a higher price tag than vinyl. Costs can vary widely depending on the type of wood (e.g., cedar, redwood, pine), the grade of the lumber, and the finishing process. Expect to pay anywhere from $6 to $20 or more per square foot for wood siding materials. High-quality cedar siding, known for its durability and natural beauty, will be at the higher end of this range. Less expensive softwoods like pine will be closer to the lower end, though they may require more frequent maintenance.
Fiber Cement Siding Material Costs
Fiber cement siding combines the durability of cement with the versatility of wood. It’s a mid-range option in terms of cost, generally falling between vinyl and wood. Prices typically range from $8 to $15 per square foot, influenced by factors like thickness, texture, and color. Premium fiber cement siding, often featuring intricate textures and finishes to mimic other materials, will be more expensive. The added durability and lower maintenance compared to wood can justify the higher initial investment for some homeowners.
Metal Siding Material Costs
Metal siding, including aluminum and steel, offers exceptional durability and longevity. While initially more expensive than vinyl, its long lifespan and minimal maintenance requirements can make it a cost-effective choice in the long run. Prices range from $8 to $20 per square foot or more, depending on the type of metal, finish (e.g., painted, powder-coated), and gauge (thickness). Steel siding is often more durable and less prone to denting than aluminum, but it also tends to be slightly more expensive.
Factors Influencing Material Pricing Variations
The price of siding materials is influenced by several factors beyond the basic type. These include:
| Factor | Impact on Price | Example |
|---|---|---|
| Material Quality | Higher quality materials generally cost more. | High-grade cedar vs. standard pine wood siding. |
| Thickness/Gauge | Thicker materials are usually more expensive and durable. | Heavier gauge steel siding vs. thinner aluminum siding. |
| Style and Texture | Intricate designs and textures increase material costs. | Embossed vinyl siding vs. smooth vinyl siding. |
| Color and Finish | Specialty colors and finishes may command a premium. | Custom-mixed paint for metal siding. |
| Manufacturer and Brand | Reputable brands often charge more for their products. | A well-known brand of fiber cement siding vs. a lesser-known brand. |
Permits and Inspections
Securing the necessary permits and passing inspections are crucial steps in any home siding installation project. These processes ensure your project adheres to local building codes and regulations, protecting both your investment and your safety. Ignoring these steps can lead to significant delays, fines, and even the need for costly rework. This section details the typical permitting process and associated costs, as well as the inspection procedures and their influence on project timelines.
The permitting process for home siding installation varies depending on your location. Generally, you’ll need to submit an application to your local building department, including detailed plans of the proposed siding work. These plans should specify the type of siding, its installation method, and any changes to the existing structure. The application typically requires information about the property, the contractor (if using one), and proof of insurance. Some jurisdictions may require additional documentation, such as energy efficiency calculations or compliance with specific environmental regulations. It’s always advisable to contact your local building department early in the planning stages to determine the exact requirements and associated fees.
Permitting Costs
The cost of obtaining permits for home siding installation is highly variable and depends on several factors, including the size of the project, the complexity of the work, and the specific requirements of your local jurisdiction. Permit fees are typically based on the estimated cost of the project or the square footage of the area being sided. For example, a small project involving siding repair might cost only a few hundred dollars in permit fees, while a complete house residing could involve fees ranging from several hundred to over a thousand dollars. In addition to the base permit fee, you may also encounter additional charges for inspections or expedited processing. It’s essential to request a detailed breakdown of all permit fees from your local building department before commencing work.
Inspection Procedures
Inspections are a critical part of the permitting process, ensuring the work is completed according to code and safety standards. The number and type of inspections required will vary depending on the scope of the project and local regulations. Common inspections include initial inspections before work begins to verify the plans and permits, mid-project inspections to assess the installation progress and adherence to specifications, and final inspections once the project is completed. Failure to pass an inspection may result in work stoppages until the necessary corrections are made. These delays can significantly impact the overall project timeline and increase costs. For instance, a failure to properly install flashing around windows during a mid-project inspection might necessitate the removal of already installed siding sections, leading to additional labor and material expenses.
Preparing Your Home for Siding Installation
Proper preparation of your home’s exterior is crucial for a successful and long-lasting siding installation. Neglecting this step can lead to issues like premature siding failure, increased costs due to repairs, and aesthetic imperfections. This section outlines the necessary steps to ensure your home is ready for a seamless siding installation.
Thorough surface preparation is paramount to achieving a high-quality siding installation. This involves removing any existing siding, cleaning the underlying surface, and addressing any structural issues before the new siding is applied. The condition of the existing structure directly impacts the longevity and appearance of the new siding. Failing to properly prepare the surface can result in uneven installation, gaps, and potential water damage over time.
Exterior Surface Cleaning and Inspection
Before any new siding can be installed, the existing exterior must be thoroughly cleaned and inspected. This involves removing any loose paint, debris, old caulking, or damaged wood. A pressure washer is often used for this task, but care must be taken to avoid damaging the underlying structure. After cleaning, a thorough inspection should be conducted to identify any areas needing repair, such as rotted wood or damaged sheathing. Addressing these issues before installation prevents problems later on. For instance, replacing rotted wood with new, treated lumber is essential to prevent future moisture problems.
Repairing Damaged Areas
Identifying and repairing damaged areas is a critical step in preparing the home for siding. This could involve replacing rotted wood sections, patching holes, or repairing damaged sheathing. For example, rotted wood around windows or doors should be completely removed and replaced with properly treated lumber to prevent water intrusion and subsequent damage. Using appropriate sealants and waterproof membranes can further protect these repaired areas. Ignoring such damage could lead to future issues such as mold growth and structural weakness.
Addressing Underlying Structural Issues
Underlying structural issues, such as uneven walls or damaged framing, must be addressed before siding installation. Uneven walls can lead to difficulty in installing siding evenly, resulting in an unprofessional look and potential issues with water runoff. Repairing these issues might involve shimming, straightening, or replacing damaged framing members. This ensures a level and stable surface for the new siding, leading to a superior and longer-lasting installation. For example, if a section of wall is significantly bowed, it may require bracing and reinforcement before siding can be installed properly.
Preparing for Flashing and Trim
Proper flashing and trim installation is vital for preventing water damage. This involves installing flashing around windows, doors, and other openings to divert water away from the building’s structure. Ensure all existing flashing is in good condition and properly sealed. Damaged flashing should be replaced before new siding is installed. The trim around windows and doors should also be inspected and repaired or replaced as needed. Properly installed flashing and trim work together to create a weather-tight seal around these vulnerable areas.
The Installation Process
Home siding installation is a multi-stage process requiring precision and expertise. A successful installation ensures both the aesthetic appeal and the long-term protection of your home. The following steps outline a typical installation, though specific procedures may vary depending on the siding material and the complexity of the project.
Preparation and Measurement
Thorough preparation is crucial for a smooth installation. This involves accurate measurements of the house’s exterior, identifying any existing issues such as rotted wood or damaged sheathing, and ensuring all necessary materials are on hand. Accurate measurements prevent material waste and ensure a perfect fit. This phase also includes the removal of old siding, if applicable, which often requires careful attention to avoid damaging the underlying structure. Inspecting the existing wall for any underlying issues like moisture damage is also a vital part of this stage.
Sheathing and Installation of House Wrap
Once the old siding is removed and the wall inspected, any necessary repairs to the underlying sheathing are completed. This might involve replacing damaged sections of wood or plywood. After repairs, a house wrap is installed. This waterproof membrane protects the home from moisture intrusion, contributing significantly to its longevity and energy efficiency. The house wrap is carefully overlapped and sealed to create a continuous barrier.
Framing and Flashing
Proper framing and flashing are essential for preventing water penetration around windows, doors, and other penetrations in the exterior wall. This involves installing flashing materials—typically metal—to direct water away from these vulnerable areas. Accurate framing ensures that the siding will have a level and consistent surface to attach to. Incorrect flashing can lead to water damage and costly repairs later on.
Siding Installation
The actual installation of the siding begins. This step involves carefully attaching the siding panels to the framing according to the manufacturer’s instructions. This often involves using nails or screws, and ensuring proper spacing and alignment between panels. The method varies significantly depending on the siding type – vinyl siding is typically nailed, while some fiber cement or wood siding may require screws. Maintaining consistent spacing and alignment is crucial for a professional-looking finish.
Caulking and Finishing
Once the siding is installed, all gaps and seams are carefully caulked to prevent water penetration. This is a critical step in ensuring the long-term weather resistance of the siding. Caulking also provides a neat and finished appearance. Finally, any trim work or accessories are installed, completing the project. Proper caulking prevents drafts and contributes to better energy efficiency.
Final Inspection
A final inspection is conducted to ensure that the installation meets all building codes and that there are no visible defects. This may involve a self-inspection by the contractor and potentially an inspection by a building inspector. Addressing any minor imperfections at this stage is much easier and less costly than doing so after the project is complete. A thorough inspection guarantees the quality and longevity of the work.
Maintenance and Repair of Home Siding
Proper maintenance is crucial for extending the lifespan of your home’s siding and preserving its aesthetic appeal. Regular inspections and timely repairs can prevent minor issues from escalating into costly replacements. Neglecting maintenance can lead to water damage, structural problems, and a significant reduction in your home’s value.
Regular Maintenance Procedures
Regular cleaning is the cornerstone of siding maintenance. This involves removing dirt, debris, and cobwebs using a garden hose with a nozzle or a pressure washer (using low pressure to avoid damage). For vinyl siding, a simple solution of mild detergent and water can be used. For wood siding, consider using a specialized wood cleaner following the manufacturer’s instructions. Annual inspections are also recommended to identify and address any potential problems early on. Check for cracks, loose panels, signs of insect infestation, or water damage. Pay close attention to areas prone to moisture buildup, such as around windows and doors.
Common Siding Problems and Solutions
Several common issues can affect various siding types. Cracked or damaged siding panels are often caused by impact or age. Repair involves replacing the damaged section with a matching panel. Loose or warped siding panels may be caused by improper installation or expansion and contraction due to temperature fluctuations. These panels should be secured or replaced, ensuring proper nailing techniques are used. Water damage, evidenced by discoloration, mold, or rotting, requires immediate attention. This often necessitates panel replacement and addressing any underlying moisture problems, such as leaking gutters or faulty flashing. Insect infestation, particularly in wood siding, requires treatment with appropriate insecticides and may necessitate the replacement of severely damaged sections. Finally, peeling paint on wood siding needs repainting to protect the wood from the elements.
Identifying and Addressing Potential Damage
Identifying potential damage early is critical in preventing larger, more costly repairs. Regular visual inspections, especially after severe weather events, are essential. Look for signs of cracking, warping, discoloration, or loose panels. Pay close attention to areas around windows, doors, and corners, as these are often vulnerable points. If you notice any damage, take immediate action. Minor repairs can often be handled by homeowners, while more extensive damage may require the services of a professional siding contractor. For example, a small crack in vinyl siding might be repaired with a vinyl patch kit, while significant water damage to wood siding would require professional assessment and likely panel replacement. Documentation of any damage, including photographs, is helpful for insurance claims or future repairs.
Estimating Total Project Costs
Accurately estimating the total cost of your home siding project is crucial for effective budgeting and avoiding unexpected expenses. This section will guide you through a practical approach to cost estimation, providing examples and a sample budget template to help you plan your project effectively. Remember that these are estimates, and actual costs may vary depending on your specific circumstances.
Estimating the total cost involves combining material costs (discussed previously), labor costs (also discussed previously), and adding in the costs of permits and any unforeseen expenses. A thorough understanding of each component, along with accurate measurements of your home’s exterior, is essential for creating a realistic budget.
Cost Calculation Examples
To illustrate cost estimation, let’s consider two hypothetical scenarios. These examples use average labor and material costs from 2024, but you should always obtain current pricing from local suppliers and contractors.
Scenario 1: 1,500 sq ft Ranch Home with Vinyl Siding
Assume vinyl siding costs $5 per square foot (including materials and installation), and permit costs are approximately $500. The total estimated cost would be (1500 sq ft * $5/sq ft) + $500 = $8000.
Scenario 2: 2,500 sq ft Two-Story Home with Fiber Cement Siding
Fiber cement siding is typically more expensive. Let’s assume the material and installation cost is $12 per square foot. With the same permit cost, the total estimated cost would be (2500 sq ft * $12/sq ft) + $500 = $30,500.
These are simplified examples. Complex designs, difficult access, or the need for significant repairs to the underlying structure will increase costs.
Sample Budget Template
A well-organized budget template helps track expenses and ensures you stay within your financial limits. Here’s a sample template:
- Material Costs:
- Siding (specify type and quantity): $XXX
- Trim and accessories: $XXX
- Flashing and sealant: $XXX
- Fasteners and other hardware: $XXX
- Labor Costs:
- Contractor fees (include detailed breakdown if possible): $XXX
- Demolition and preparation: $XXX
- Installation: $XXX
- Cleanup: $XXX
- Permits and Inspections: $XXX
- Contingency Fund (for unexpected expenses): 10-15% of total estimated cost
- Total Estimated Cost: $XXX
Remember to fill in the “$XXX” placeholders with actual costs obtained from your chosen contractor and material suppliers. The contingency fund is crucial; it helps cover unforeseen issues that might arise during the installation process.
Saving Money on Siding Installation
Reducing the overall cost of your home siding installation requires careful planning and consideration of various factors. This section outlines practical strategies to minimize expenses without compromising the quality of materials or workmanship. By employing these techniques, homeowners can significantly reduce the financial burden associated with this substantial home improvement project.
Strategies for Reducing Installation Costs
Several approaches can help you save money on your siding installation. Prioritizing efficient project management and leveraging cost-effective solutions are key. Careful consideration of material choices, labor costs, and project scope significantly impacts the final price.
- Shop around for materials: Compare prices from multiple suppliers to find the best deals on siding, trim, and other necessary materials. Consider purchasing materials during off-season or taking advantage of sales and discounts.
- Choose less expensive siding options: While premium siding materials offer superior durability and aesthetics, more budget-friendly options, such as vinyl or fiber cement, can significantly reduce overall costs without sacrificing functionality. Consider the long-term cost-benefit analysis of each material option.
- Minimize waste: Precise measurements and careful planning can minimize material waste, reducing the overall material costs. Consult with your contractor to optimize material usage.
- Consider DIY installation (with caveats): While DIY installation can potentially save on labor costs, it requires significant time, skills, and the right tools. Improper installation can lead to costly repairs down the line, potentially negating any initial savings. A realistic assessment of your skills is crucial.
- Stagger your project: Instead of undertaking the entire siding project at once, consider a phased approach, completing sections over time. This allows for better budget management and minimizes the financial strain.
DIY Installation Versus Professional Services
The decision to opt for DIY installation versus hiring a professional hinges on a careful assessment of your skills, available time, and risk tolerance.
DIY installation offers the potential for substantial cost savings, as labor costs constitute a significant portion of the overall project expense. However, improper installation can lead to structural issues, water damage, and reduced energy efficiency, ultimately resulting in higher costs in the long run. Furthermore, DIY projects often take longer to complete due to the learning curve involved.
Professional installation, while more expensive upfront, guarantees a quality finish, adherence to building codes, and a warranty that protects against potential defects. Experienced contractors possess the skills and tools to complete the project efficiently and correctly, minimizing the risk of costly mistakes.
Negotiating Prices with Contractors
Effective negotiation is crucial in securing a favorable price for your siding installation.
Obtain multiple quotes from reputable contractors. Compare these quotes meticulously, paying attention to the specifics of the services offered, materials used, and the timeline for project completion. Clearly outline your budget constraints and be prepared to discuss your priorities to potentially find areas where compromises can be made without sacrificing quality. Don’t hesitate to negotiate based on the details of the quotes received.
Consider asking contractors about potential discounts for bundled services or for paying in cash. Also, inquire about any financing options they may offer. Maintain open and honest communication throughout the negotiation process to establish a mutually beneficial agreement.
Final Thoughts
Updating your home’s siding is a significant investment, impacting both its aesthetic appeal and long-term value. This guide has provided a detailed roadmap, covering everything from material selection and cost estimation to contractor vetting and post-installation maintenance. By understanding the key factors influencing costs and employing the strategies outlined here, you can confidently navigate the process and achieve your desired results while staying within budget. Remember, a well-informed approach ensures a successful and satisfying home improvement project.